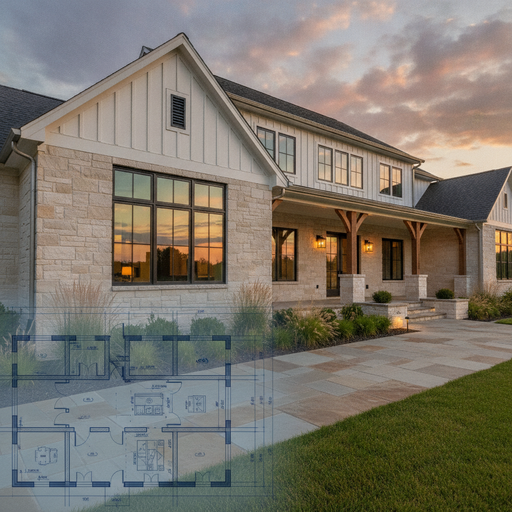
Tag: Custom Home Building

  • From Blueprint to Curb Appeal: A Realistic Guide to Your Custom Home Exterior Timeline and Costs

    From Blueprint to Curb Appeal: A Realistic Guide to Your Custom Home Exterior Timeline and Costs

    The Dream of the Perfect Facade

    Imagine standing at the edge of an empty lot, clutching a rolled-up set of blueprints that contain the future of your family’s life. You can almost see it—the way the morning sun will hit the gables, the texture of the stone accents, and the inviting glow of the entryway. But then, reality sets in. How long will it actually take to transform this patch of dirt into a stuing custom exterior? And more importantly, what is it going to do to your bank account?

    Building a custom home exterior is a journey of a thousand decisions. Unlike a cookie-cutter subdivision home, a custom exterior is a reflection of your personality. However, that uniqueness comes with a complex web of timelines and costs. To help you navigate this process without losing your mind, we’re going to break down the stages of construction, the financial investment required, and the storytelling rhythm of bringing a house to life.

    Phase 1: The Invisible Foundation (Plaing and Permits)

    Every great story starts with a solid setup. Before a single hammer swings, there is a period of “invisible work.” For most homeowners, this is the most frustrating part of the timeline because it feels like nothing is happening. In reality, this is where the most critical decisions are made.

    The Timeline: 1 to 3 Months

    Depending on your local municipality, getting permits can take anywhere from a few weeks to several months. During this time, you are finalizing material selections. Are you going with James Hardie siding or natural cedar? Will the roof be architectural shingles or standing seam metal? These choices must be locked in early because supply chain lead times can drastically affect your start date.

    The Cost: $5,000 – $15,000+

    While you aren’t paying for physical labor yet, you are paying for architectural fees, engineering reports, and permit applications. Skipping the professional design phase to save money is a classic mistake that often leads to “change orders” later, which are the primary killers of construction budgets.

    Phase 2: Framing and The Building Envelope

    This is the “growth spurt” phase. One day you have a foundation, and a week later, you have the skeleton of a house. It’s an exciting time where the scale of your vision finally becomes tangible.

    The Timeline: 4 to 8 Weeks

    Once the foundation is cured, framing moves quickly. However, the exterior isn’t just wood. It involves the installation of the “house wrap” or weather barrier. This is the skin of the house that protects it from moisture. After framing, the windows and exterior doors are installed. A “dried-in” house is a major milestone because it means the interior is finally protected from the elements.

    The Cost: $30,000 – $100,000+

    Framing costs vary wildly based on the complexity of your roofline and the square footage. Large, custom windows are another major expense. In the current market, a single high-end custom front door can cost as much as a used car. Expect to allocate a significant portion of your budget here to ensure the structure is sound and energy-efficient.

    Phase 3: The “Face” of the Home (Siding and Masonry)

    This is where the magic happens. This phase is what people actually see when they drive by. It’s the difference between a house that looks “under construction” and one that looks like a home.

    The Timeline: 3 to 6 Weeks

    Installing siding, brick, or stone is meticulous work. If you’ve choseatural stone veneer, the process is much slower than installing vinyl or composite siding. Every stone is hand-cut and placed by a mason. Weather plays a massive role here; a week of heavy rain can easily push your masonry schedule back by ten days.

    The Cost: $15,000 – $75,000

    Materials are the primary driver here.

    • Vinyl Siding: Affordable and fast, but lacks that “custom” feel.
    • Fiber Cement (Hardie Board): The gold standard for durability and aesthetics.
    • Natural Stone/Brick: The most expensive option, but offers incredible ROI and longevity.

    Don’t forget the trim! Fascia, soffits, and decorative corbels add that “finished” look but require detailed labor that adds up quickly.

    Phase 4: Roofing and Finishing Touches

    A roof is more than just protection; it’s the hat that completes the outfit. At the same time, painters and light installers are buzzing around the perimeter.

    The Timeline: 1 to 2 Weeks

    Most roofing jobs only take a few days, but they require a clear weather window. Once the roof is on, the exterior painters arrive to provide the final color palette. Finally, the “jewelry” of the home—the exterior lanterns, house numbers, and mailbox—are installed.

    The Cost: $10,000 – $40,000

    Standard asphalt shingles are the most common choice, costing on the lower end. However, if you opt for slate, tile, or high-end metal roofing, your costs can triple. Exterior lighting and gutters often surprise homeowners with their price tags, so keep a “miscellaneous” fund of at least $5,000 for these finishing touches.

    Why Does the Price Change? (The Hidden Variables)

    You might look at these numbers and wonder why the ranges are so wide. The truth is, building a custom home exterior is like ordering a suit. You can buy one off the rack, or you can have one hand-stitched to your exact measurements. Here are the three things that usually drive the price up:

    1. Architectural Complexity

    A simple rectangular house is easy to clad. A house with multiple gables, turrets, bump-outs, and varying roof pitches requires significantly more material waste and much higher labor costs. Every corner and every joint is a potential point of failure that requires expert craftsmanship.

    2. Geographical Location

    Building in a coastal area requires hurricane-rated windows and salt-resistant finishes, which are significantly more expensive. Building in the mountains may require extra insulation and fire-resistant materials. Furthermore, labor rates in metropolitan areas like New York or San Francisco can be double what they are in rural areas.

    3. Supply Chain and Inflation

    In the post-2020 world, material costs are no longer static. Lumber, steel, and resin-based products fluctuate monthly. A quote you received in January might not be valid in June. Always build a 10-15% “inflation cushion” into your budget to avoid mid-project heartaches.

    The Emotional Timeline: Managing Your Expectations

    Beyond the weeks and the dollars, there is the emotional toll. There will be a week where it looks like nothing happened. There will be a day when the wrong color stone arrives. This is all part of the story. The key to a successful custom exterior build is communication. A good contractor will keep you updated on the “why” behind every delay.

    The total timeline for a custom home exterior typically spans 4 to 8 months from the first permit to the final coat of paint. It is a marathon, not a sprint. But the first time you pull into your driveway and see your vision standing there, solid and beautiful, the months of waiting and every dollar spent will feel worth it.

    Conclusion

    Creating a custom home exterior is a massive undertaking that requires balancing your aesthetic dreams with the hard reality of budgets and schedules. By understanding that the process involves distinct phases—from the quiet plaing stages to the flurry of masonry and finishing—you can approach your project with confidence. Plan for a timeline of roughly six months and a budget that accounts for both your “must-haves” and those inevitable “just-in-case” moments. In the end, you aren’t just building a shell; you’re building the face of your future memories.
  • From Blueprint to Curb Appeal: A Realistic Guide to Your Custom Home Exterior Timeline and Costs

    From Blueprint to Curb Appeal: A Realistic Guide to Your Custom Home Exterior Timeline and Costs

    The Dream of the Perfect Facade

    Imagine standing at the edge of an empty lot, clutching a rolled-up set of blueprints that contain the future of your family’s life. You can almost see it—the way the morning sun will hit the gables, the texture of the stone accents, and the inviting glow of the entryway. But then, reality sets in. How long will it actually take to transform this patch of dirt into a stuing custom exterior? And more importantly, what is it going to do to your bank account?

    Building a custom home exterior is a journey of a thousand decisions. Unlike a cookie-cutter subdivision home, a custom exterior is a reflection of your personality. However, that uniqueness comes with a complex web of timelines and costs. To help you navigate this process without losing your mind, we’re going to break down the stages of construction, the financial investment required, and the storytelling rhythm of bringing a house to life.

    Phase 1: The Invisible Foundation (Plaing and Permits)

    Every great story starts with a solid setup. Before a single hammer swings, there is a period of “invisible work.” For most homeowners, this is the most frustrating part of the timeline because it feels like nothing is happening. In reality, this is where the most critical decisions are made.

    The Timeline: 1 to 3 Months

    Depending on your local municipality, getting permits can take anywhere from a few weeks to several months. During this time, you are finalizing material selections. Are you going with James Hardie siding or natural cedar? Will the roof be architectural shingles or standing seam metal? These choices must be locked in early because supply chain lead times can drastically affect your start date.

    The Cost: $5,000 – $15,000+

    While you aren’t paying for physical labor yet, you are paying for architectural fees, engineering reports, and permit applications. Skipping the professional design phase to save money is a classic mistake that often leads to “change orders” later, which are the primary killers of construction budgets.

    Phase 2: Framing and The Building Envelope

    This is the “growth spurt” phase. One day you have a foundation, and a week later, you have the skeleton of a house. It’s an exciting time where the scale of your vision finally becomes tangible.

    The Timeline: 4 to 8 Weeks

    Once the foundation is cured, framing moves quickly. However, the exterior isn’t just wood. It involves the installation of the “house wrap” or weather barrier. This is the skin of the house that protects it from moisture. After framing, the windows and exterior doors are installed. A “dried-in” house is a major milestone because it means the interior is finally protected from the elements.

    The Cost: $30,000 – $100,000+

    Framing costs vary wildly based on the complexity of your roofline and the square footage. Large, custom windows are another major expense. In the current market, a single high-end custom front door can cost as much as a used car. Expect to allocate a significant portion of your budget here to ensure the structure is sound and energy-efficient.

    Phase 3: The “Face” of the Home (Siding and Masonry)

    This is where the magic happens. This phase is what people actually see when they drive by. It’s the difference between a house that looks “under construction” and one that looks like a home.

    The Timeline: 3 to 6 Weeks

    Installing siding, brick, or stone is meticulous work. If you’ve choseatural stone veneer, the process is much slower than installing vinyl or composite siding. Every stone is hand-cut and placed by a mason. Weather plays a massive role here; a week of heavy rain can easily push your masonry schedule back by ten days.

    The Cost: $15,000 – $75,000

    Materials are the primary driver here.

    • Vinyl Siding: Affordable and fast, but lacks that “custom” feel.
    • Fiber Cement (Hardie Board): The gold standard for durability and aesthetics.
    • Natural Stone/Brick: The most expensive option, but offers incredible ROI and longevity.

    Don’t forget the trim! Fascia, soffits, and decorative corbels add that “finished” look but require detailed labor that adds up quickly.

    Phase 4: Roofing and Finishing Touches

    A roof is more than just protection; it’s the hat that completes the outfit. At the same time, painters and light installers are buzzing around the perimeter.

    The Timeline: 1 to 2 Weeks

    Most roofing jobs only take a few days, but they require a clear weather window. Once the roof is on, the exterior painters arrive to provide the final color palette. Finally, the “jewelry” of the home—the exterior lanterns, house numbers, and mailbox—are installed.

    The Cost: $10,000 – $40,000

    Standard asphalt shingles are the most common choice, costing on the lower end. However, if you opt for slate, tile, or high-end metal roofing, your costs can triple. Exterior lighting and gutters often surprise homeowners with their price tags, so keep a “miscellaneous” fund of at least $5,000 for these finishing touches.

    Why Does the Price Change? (The Hidden Variables)

    You might look at these numbers and wonder why the ranges are so wide. The truth is, building a custom home exterior is like ordering a suit. You can buy one off the rack, or you can have one hand-stitched to your exact measurements. Here are the three things that usually drive the price up:

    1. Architectural Complexity

    A simple rectangular house is easy to clad. A house with multiple gables, turrets, bump-outs, and varying roof pitches requires significantly more material waste and much higher labor costs. Every corner and every joint is a potential point of failure that requires expert craftsmanship.

    2. Geographical Location

    Building in a coastal area requires hurricane-rated windows and salt-resistant finishes, which are significantly more expensive. Building in the mountains may require extra insulation and fire-resistant materials. Furthermore, labor rates in metropolitan areas like New York or San Francisco can be double what they are in rural areas.

    3. Supply Chain and Inflation

    In the post-2020 world, material costs are no longer static. Lumber, steel, and resin-based products fluctuate monthly. A quote you received in January might not be valid in June. Always build a 10-15% “inflation cushion” into your budget to avoid mid-project heartaches.

    The Emotional Timeline: Managing Your Expectations

    Beyond the weeks and the dollars, there is the emotional toll. There will be a week where it looks like nothing happened. There will be a day when the wrong color stone arrives. This is all part of the story. The key to a successful custom exterior build is communication. A good contractor will keep you updated on the “why” behind every delay.

    The total timeline for a custom home exterior typically spans 4 to 8 months from the first permit to the final coat of paint. It is a marathon, not a sprint. But the first time you pull into your driveway and see your vision standing there, solid and beautiful, the months of waiting and every dollar spent will feel worth it.

    Conclusion

    Creating a custom home exterior is a massive undertaking that requires balancing your aesthetic dreams with the hard reality of budgets and schedules. By understanding that the process involves distinct phases—from the quiet plaing stages to the flurry of masonry and finishing—you can approach your project with confidence. Plan for a timeline of roughly six months and a budget that accounts for both your “must-haves” and those inevitable “just-in-case” moments. In the end, you aren’t just building a shell; you’re building the face of your future memories.

  • Elevating Your Home’s Character: A Deep Dive into Creative Custom Exterior Wood Siding Ideas

    Elevating Your Home’s Character: A Deep Dive into Creative Custom Exterior Wood Siding Ideas

    The First Impression: A Story Told in Timber

    Imagine pulling into your driveway after a long day. As the sun begins to dip below the horizon, casting a warm, golden glow across your neighborhood, your house stands out—not because it is the largest or the loudest, but because it possesses a soul. There is a texture to the walls, a rhythmic pattern of shadows and highlights that shifts with the light. This is the magic of custom exterior wood siding. It is more than just a protective shell; it is the skin of your home, telling a story of craftsmanship, nature, and personal style.

    For decades, many homeowners settled for cookie-cutter exteriors—beige vinyl or flat stucco that lacked personality. But today, there is a massive shift back toward the organic. We are seeing a renaissance of wood siding, reimagined through modern technology and creative design. Whether you are aiming for a rugged mountain cabin vibe, a sleek Scandinavian masterpiece, or a cozy modern farmhouse, custom wood siding offers a versatility that no other material can match.

    Choosing Your Canvas: The Beauty of Wood Species

    Before we dive into the patterns and layouts, we have to talk about the “protagonist” of our story: the wood itself. Not all wood is created equal, and the species you choose will dictate the color, grain, and longevity of your home’s exterior.

    Western Red Cedar: The Timeless Classic

    If wood siding had a royal family, Western Red Cedar would be the king. It is beloved by architects and homeowners alike for its stuing tonal variations—ranging from pale ambers to deep chocolate browns. Beyond its beauty, cedar contains natural oils that act as preservatives, making it resistant to rot, decay, and insect attacks. When left untreated, it weathers into a beautiful silvery-grey, but it also takes stains exceptionally well if you want to maintain that rich, warm glow.

    Redwood: The Luxurious Choice

    Mainly found in the Western United States, Redwood is the epitome of luxury. It has a remarkably straight grain and a deep, reddish-brown hue that exudes elegance. Like cedar, it is naturally durable. Because it has very little resin, it absorbs finishes beautifully, ensuring that your custom color stays vibrant for years to come.

    Accoya and Modified Woods: The Future of Siding

    For those who love the look of wood but worry about the maintenance, modified woods like Accoya are a game-changer. Through a process called acetylation, the wood’s chemical structure is altered to make it incredibly stable and virtually rot-proof. It doesn’t shrink or swell, meaning your custom joinery stays tight and perfect for decades. It is the marriage of nature’s beauty and human iovation.

    Defining the Texture: Custom Profiles and Layouts

    Once you’ve picked your species, the real fun begins. How the wood is cut and installed—the “profile”—is where your home’s personality truly shines. Gone are the days when horizontal lap siding was the only option. Customization allows us to play with geometry and shadow.

    The Rise of Vertical Siding

    If you want to make your home look taller and more modern, vertical siding is the way to go. By drawing the eye upward, vertical lines create a sense of grandeur. You can use traditional “Board and Batten,” where wide planks are joined by thin strips of wood (battens), creating a rustic yet structured look. For a more contemporary feel, consider vertical tongue-and-groove planks with “nickel-gap” spacing, providing clean, sharp lines that look stuing on minimalist designs.

    Horizontal Sophistication: Shiplap and Rainscreens

    Horizontal siding remains a favorite, but custom applications have elevated it. Shiplap, with its overlapping joint, creates a tight seal and a smooth surface. However, the “open joint rainscreen” is currently taking the architectural world by storm. In this setup, individual wood slats are installed with small gaps between them over a waterproof barrier. This creates incredible depth and shadow lines, giving the facade a “floating” appearance that is breathtakingly modern.

    Shingles and Shakes: Adding Hand-Crafted Charm

    For those who lean toward a more artisanal or coastal aesthetic, custom wood shingles or shakes provide unmatched texture. Shakes are typically hand-split, giving them a rugged, uneven surface that feels deeply coected to nature. Shingles are sawn more uniformly for a cleaner look. Mixing these with traditional planks on gables or accent walls can break up the visual weight of a large house and add “human-scale” detail.

    Shou Sugi Ban: The Art of Charred Wood

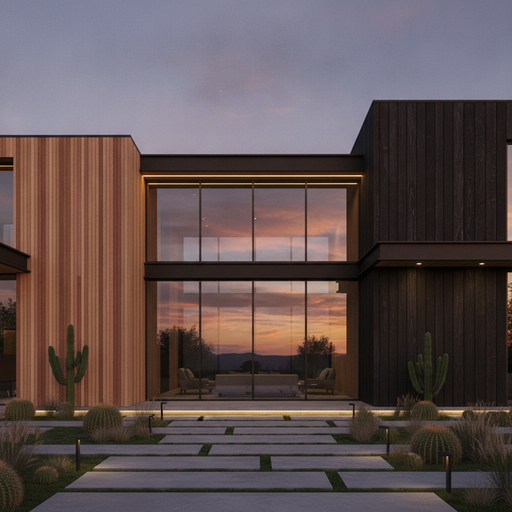
    One of the most exciting trends in custom exterior siding is the ancient Japanese technique of Shou Sugi Ban. This involves charring the surface of the wood with fire to create a carbonized layer. The result is a stuing, deep black finish that highlights the natural grain of the wood in a way that paint never could.

    But Shou Sugi Ban isn’t just about the “cool factor.” The charring process actually makes the wood more durable. It becomes fire-resistant, insect-resistant, and incredibly weather-hardy. In a modern architectural context, a Shou Sugi Ban accent wall paired with light-colored stone or glass creates a high-contrast look that is guaranteed to turn heads.

    Mixing Materials: Wood as an Accent

    You don’t have to cover your entire house in wood to make a statement. In fact, some of the most beautiful custom homes use wood as a strategic accent. Imagine a home with sleek, charcoal-colored metal panels contrasted by a warm, honey-toned cedar entryway. Or a white brick house with dark oak “lintels” and wood-clad soffits.

    Using wood in protected areas—like under porch ceilings or within recessed window frames—allows you to enjoy the warmth of the material while minimizing its exposure to the elements. This “hybrid” approach is perfect for homeowners who want the aesthetic of custom wood without the commitment of a full-timber exterior.

    Maintenance: Protecting Your Investment

    Let’s be honest: wood is a living material, and it requires love. However, modern finishes have made maintenance much easier than it used to be. High-quality UV-resistant stains and oils can protect your siding from bleaching in the sun. If you prefer the weathered, grey look, you can apply “weathering bleaches” that help the wood age uniformly, avoiding the blotchy transition phase.

    A good rule of thumb for custom wood siding is to inspect it aually. Look for signs of moisture retention or areas where the finish might be thiing. A simple wash and a fresh coat of oil every few years will keep your home looking as spectacular as the day the siding was installed.

    Conclusion: Crafting a Legacy

    Choosing custom exterior wood siding is an investment in your home’s character and its future value. It is a rejection of the bland and an embrace of the authentic. Whether you choose the charred mystery of Shou Sugi Ban, the clean lines of a vertical rainscreen, or the classic warmth of Western Red Cedar, you are creating a home that feels alive.

    Your home is your sanctuary, and its exterior should reflect the care and thought you put into the life lived inside. By playing with species, textures, and installation methods, you can transform a simple building into a work of art that will stand the test of time and provide a warm welcome to everyone who crosses your threshold.