Category: Uncategorized

  • The California Dream Reimagined: Innovative Solutions for the Housing Affordability Crisis

    The California Dream Reimagined: Innovative Solutions for the Housing Affordability Crisis

    The Golden State’s Greatest Challenge

    For decades, the “California Dream” was a simple, evocative promise: a stable job, a patch of sun-drenched land, and a home to call your own. From the foggy hills of San Francisco to the sprawling suburbs of Riverside, millions chased this dream, turning California into a global powerhouse. But today, for many residents like Sarah, a 30-year-old teacher in Los Angeles, that dream feels more like a mirage. Sarah loves her community, but after spending 50% of her paycheck on a modest one-bedroom apartment, she wonders if she has a future here.

    Sarah’s story isn’t unique. California faces a housing deficit that has been decades in the making, driven by a combination of high demand, restrictive zoning, and soaring construction costs. However, the narrative is begiing to shift. Across the state, policymakers, iovators, and communities are pivoting toward bold solutions. The road to affordability is long, but the blueprint for a more accessible California is finally being drawn.

    Rewriting the Rules: The End of Single-Family Zoning

    One of the most significant hurdles to housing affordability has historically been “exclusionary zoning.” For much of the 20th century, vast swaths of California land were reserved exclusively for single-family homes. While this created iconic suburbaeighborhoods, it also limited the number of homes that could be built on any given acre, driving prices sky-high as the population grew.

    The tide began to turn with the passage of landmark legislation like Senate Bill 9 (SB 9). This law effectively ended traditional single-family zoning by allowing homeowners to split their lots or build duplexes on land previously reserved for one house. By increasing density in existing neighborhoods, California is finding ways to create “missing middle” housing—the townhomes and duplexes that are naturally more affordable than sprawling estates but more spacious than high-rise apartments.

    The Power of Accessory Dwelling Units (ADUs)

    If you walk through a residential neighborhood in San Diego or San Jose today, you might notice something new in the backyards: ADUs, often called “gray flats” or “casitas.” California has aggressively streamlined the permitting process for these small, self-contained units. What was once a bureaucratic nightmare is now a streamlined path for homeowners to add value to their property while providing much-needed rental stock.

    ADUs represent a “gentle density” approach. They allow for more people to live in high-opportunity areas without drastically changing the visual character of the neighborhood. For families, it means a place for aging parents or adult children; for the state, it means thousands of new homes built without a single cent of public subsidy.

    Streamlining the Path from Blueprint to Brick

    Building in California has notoriously been a slow and expensive endeavor. Environmental reviews, local opposition (often referred to as NIMBYism, or “Not In My Backyard”), and complex permit fees can add years to a project’s timeline and hundreds of thousands of dollars to its cost. To combat this, the state has introduced “by-right” approvals for certain affordable housing projects.

    When a project meets specific affordability and zoning criteria, it caow bypass lengthy discretionary reviews. This “SB 35” process has already fast-tracked thousands of units. By removing the uncertainty of the approval process, developers are more willing to take on the risk of building affordable developments, knowing that their projects won’t be killed by eleventh-hour political opposition.

    Iovation in Construction: Modular and 3D-Printed Homes

    Beyond policy, the way we physically build homes is undergoing a revolution. The traditional method of “stick-built” construction is labor-intensive and vulnerable to weather delays. Enter modular housing. In factories across the West Coast, entire apartment modules are being built in controlled environments, complete with plumbing, wiring, and finishes. These modules are then transported to the site and stacked like Lego bricks.

    Modular construction can cut building times by 30% to 50% and significantly reduce waste. Additionally, 3D-printing technology is emerging as a viable solution for low-cost, durable housing. By using robotic arms to extrude concrete layers, companies can “print” the shell of a house in a matter of days. These technological leaps are essential to lowering the “hard costs” of construction, making it possible to offer lower rents to the end-user.

    Public Investment and the Return of Social Housing

    While the private market plays a massive role, it caot solve the crisis alone. There is a growing recognition that the state must invest directly in housing for its most vulnerable residents. California has utilized the Low-Income Housing Tax Credit (LIHTC) and various bond measures, like Proposition 1, to fund permanent supportive housing for those experiencing homelessness and low-income workers.

    There is also a burgeoning movement toward “Social Housing”—a model popular in cities like Viea and Singapore. In this model, the government or a non-profit entity develops and manages housing that is rent-capped and open to a mix of income levels. By taking the profit motive out of a portion of the housing stock, the state can ensure that essential workers—the nurses, bus drivers, and teachers like Sarah—can afford to live in the communities they serve.

    The Role of Transit-Oriented Development

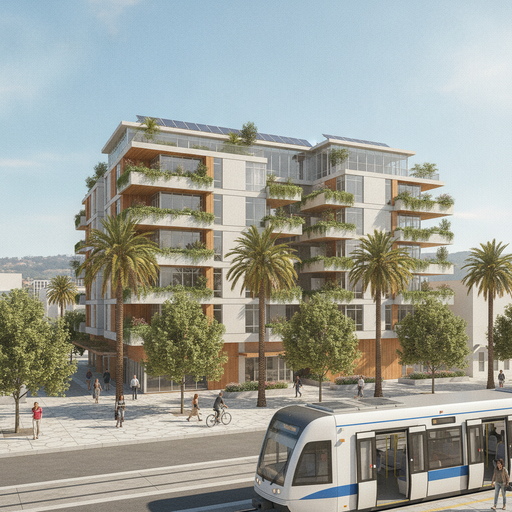
    Affordability isn’t just about the rent; it’s about the total cost of living, which includes transportation. California is increasingly focusing on Transit-Oriented Development (TOD). By incentivizing high-density housing near major transit hubs like BART in the Bay Area or the Metro in LA, the state is tackling two problems at once: the housing shortage and carbon emissions.

    When people live near transit, they can opt for a “car-light” lifestyle, saving thousands of dollars aually on gas, insurance, and maintenance. New laws now prohibit cities from imposing minimum parking requirements on developments near transit, allowing developers to use that space for more housing units instead of expensive parking garages.

    Conclusion: A Future Built on Inclusion

    Solving California’s housing crisis is not a matter of finding a single “silver bullet.” It is a multifaceted challenge that requires a “silver buckshot” approach—a combination of zoning reform, technological iovation, streamlined regulations, and direct public investment. The progress made in recent years proves that when the state prioritizes housing as a humaecessity rather than just a commodity, change is possible.

    For Sarah, these changes mean hope. It might mean a new duplex coming to her neighborhood, an ADU she can afford to rent, or a modular apartment complex near the subway line that takes her to work. The California Dream is changing, shifting away from the isolated suburban mansion toward a more inclusive, vibrant, and sustainable vision of community. By continuing to push for these solutions, California can ensure that the Golden State remains a place where everyone, regardless of their income, has a place to call home.
  • The California Dream Reimagined: Innovative Solutions for the Housing Affordability Crisis

    The California Dream Reimagined: Innovative Solutions for the Housing Affordability Crisis

    The Golden State’s Greatest Challenge

    For decades, the “California Dream” was a simple, evocative promise: a stable job, a patch of sun-drenched land, and a home to call your own. From the foggy hills of San Francisco to the sprawling suburbs of Riverside, millions chased this dream, turning California into a global powerhouse. But today, for many residents like Sarah, a 30-year-old teacher in Los Angeles, that dream feels more like a mirage. Sarah loves her community, but after spending 50% of her paycheck on a modest one-bedroom apartment, she wonders if she has a future here.

    Sarah’s story isn’t unique. California faces a housing deficit that has been decades in the making, driven by a combination of high demand, restrictive zoning, and soaring construction costs. However, the narrative is begiing to shift. Across the state, policymakers, iovators, and communities are pivoting toward bold solutions. The road to affordability is long, but the blueprint for a more accessible California is finally being drawn.

    Rewriting the Rules: The End of Single-Family Zoning

    One of the most significant hurdles to housing affordability has historically been “exclusionary zoning.” For much of the 20th century, vast swaths of California land were reserved exclusively for single-family homes. While this created iconic suburbaeighborhoods, it also limited the number of homes that could be built on any given acre, driving prices sky-high as the population grew.

    The tide began to turn with the passage of landmark legislation like Senate Bill 9 (SB 9). This law effectively ended traditional single-family zoning by allowing homeowners to split their lots or build duplexes on land previously reserved for one house. By increasing density in existing neighborhoods, California is finding ways to create “missing middle” housing—the townhomes and duplexes that are naturally more affordable than sprawling estates but more spacious than high-rise apartments.

    The Power of Accessory Dwelling Units (ADUs)

    If you walk through a residential neighborhood in San Diego or San Jose today, you might notice something new in the backyards: ADUs, often called “gray flats” or “casitas.” California has aggressively streamlined the permitting process for these small, self-contained units. What was once a bureaucratic nightmare is now a streamlined path for homeowners to add value to their property while providing much-needed rental stock.

    ADUs represent a “gentle density” approach. They allow for more people to live in high-opportunity areas without drastically changing the visual character of the neighborhood. For families, it means a place for aging parents or adult children; for the state, it means thousands of new homes built without a single cent of public subsidy.

    Streamlining the Path from Blueprint to Brick

    Building in California has notoriously been a slow and expensive endeavor. Environmental reviews, local opposition (often referred to as NIMBYism, or “Not In My Backyard”), and complex permit fees can add years to a project’s timeline and hundreds of thousands of dollars to its cost. To combat this, the state has introduced “by-right” approvals for certain affordable housing projects.

    When a project meets specific affordability and zoning criteria, it caow bypass lengthy discretionary reviews. This “SB 35” process has already fast-tracked thousands of units. By removing the uncertainty of the approval process, developers are more willing to take on the risk of building affordable developments, knowing that their projects won’t be killed by eleventh-hour political opposition.

    Iovation in Construction: Modular and 3D-Printed Homes

    Beyond policy, the way we physically build homes is undergoing a revolution. The traditional method of “stick-built” construction is labor-intensive and vulnerable to weather delays. Enter modular housing. In factories across the West Coast, entire apartment modules are being built in controlled environments, complete with plumbing, wiring, and finishes. These modules are then transported to the site and stacked like Lego bricks.

    Modular construction can cut building times by 30% to 50% and significantly reduce waste. Additionally, 3D-printing technology is emerging as a viable solution for low-cost, durable housing. By using robotic arms to extrude concrete layers, companies can “print” the shell of a house in a matter of days. These technological leaps are essential to lowering the “hard costs” of construction, making it possible to offer lower rents to the end-user.

    Public Investment and the Return of Social Housing

    While the private market plays a massive role, it caot solve the crisis alone. There is a growing recognition that the state must invest directly in housing for its most vulnerable residents. California has utilized the Low-Income Housing Tax Credit (LIHTC) and various bond measures, like Proposition 1, to fund permanent supportive housing for those experiencing homelessness and low-income workers.

    There is also a burgeoning movement toward “Social Housing”—a model popular in cities like Viea and Singapore. In this model, the government or a non-profit entity develops and manages housing that is rent-capped and open to a mix of income levels. By taking the profit motive out of a portion of the housing stock, the state can ensure that essential workers—the nurses, bus drivers, and teachers like Sarah—can afford to live in the communities they serve.

    The Role of Transit-Oriented Development

    Affordability isn’t just about the rent; it’s about the total cost of living, which includes transportation. California is increasingly focusing on Transit-Oriented Development (TOD). By incentivizing high-density housing near major transit hubs like BART in the Bay Area or the Metro in LA, the state is tackling two problems at once: the housing shortage and carbon emissions.

    When people live near transit, they can opt for a “car-light” lifestyle, saving thousands of dollars aually on gas, insurance, and maintenance. New laws now prohibit cities from imposing minimum parking requirements on developments near transit, allowing developers to use that space for more housing units instead of expensive parking garages.

    Conclusion: A Future Built on Inclusion

    Solving California’s housing crisis is not a matter of finding a single “silver bullet.” It is a multifaceted challenge that requires a “silver buckshot” approach—a combination of zoning reform, technological iovation, streamlined regulations, and direct public investment. The progress made in recent years proves that when the state prioritizes housing as a humaecessity rather than just a commodity, change is possible.

    For Sarah, these changes mean hope. It might mean a new duplex coming to her neighborhood, an ADU she can afford to rent, or a modular apartment complex near the subway line that takes her to work. The California Dream is changing, shifting away from the isolated suburban mansion toward a more inclusive, vibrant, and sustainable vision of community. By continuing to push for these solutions, California can ensure that the Golden State remains a place where everyone, regardless of their income, has a place to call home.
  • Mastering the American Dream: A Guide to the Best Property Investment Strategies in the USA

    Mastering the American Dream: A Guide to the Best Property Investment Strategies in the USA

    The Changing Face of the American Dream

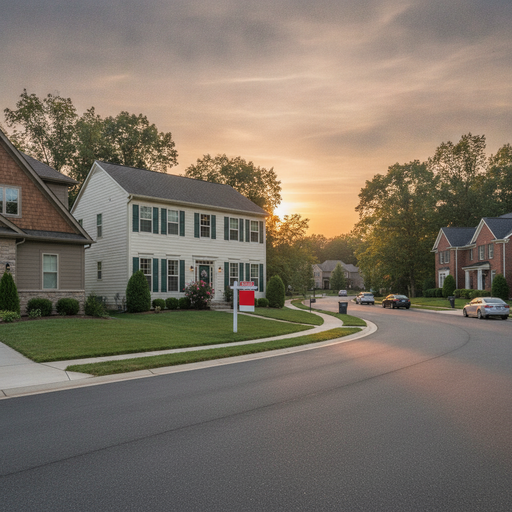
    Imagine for a moment that you are standing on a quiet street in a suburbaeighborhood in Raleigh, North Carolina. The sun is setting, painting the sky in hues of orange and purple. You look at a charming three-bedroom house with a neatly trimmed lawn. To most, this is just a home. But to a savvy investor, this is a vehicle for generational wealth. For decades, the “American Dream” was defined by owning a home to live in. Today, that dream has evolved. Now, it is about owning properties that work for you while you sleep.

    The United States remains one of the most attractive real estate markets in the world. Its vast geography, diverse economy, and legal transparency offer a playground for investors of all levels. However, the sheer size of the market can be overwhelming. From the high-rise condos of Miami to the multi-family units in the Midwest, where do you even begin? Investing in US property isn’t a “one-size-fits-all” endeavor; it’s a journey that requires a map, a compass, and a solid strategy.

    The Foundation: Why Invest in US Real Estate?

    Before we dive into the specific strategies, we need to understand why the US is such a magnet for capital. Unlike many countries, the US offers a unique combination of long-term capital appreciation and consistent cash flow. The legal system is incredibly investor-friendly, with clear title laws and a well-established banking system. Moreover, the US population continues to grow, and the demand for housing—whether for rent or for sale—remains chronically higher than the supply.

    Whether you are a local resident looking to secure your retirement or an international investor seeking a safe haven for your funds, the US property market provides a buffet of options. But to succeed, you need to move past the “buy and hope” mentality. You need a strategy that aligns with your financial goals, your risk tolerance, and the amount of time you can realistically commit.

    Strategy 1: The Classic Buy-and-Hold (The Marathon)

    Meet Sarah. Sarah works a demanding 9-to-5 job and doesn’t want a second career in construction or high-stakes trading. She chooses the Buy-and-Hold strategy. This is the bedrock of real estate investing. You purchase a residential property—typically a single-family home or a small apartment building—and lease it to long-term tenants.

    The beauty of this strategy lies in its simplicity and the “triple threat” of returns:

    • Cash Flow: The monthly rent covers the mortgage, taxes, and insurance, leaving a little extra in your pocket.
    • Appreciation: Over time, the value of the property generally increases. In 20 years, that $300,000 home might be worth $600,000.
    • Tax Benefits: The US tax code is very generous toward property owners, allowing for deductions on mortgage interest, property taxes, and depreciation.

    For Sarah, this is a passive way to build wealth. She hires a property management company to handle the “leaky toilets and tenant complaints,” allowing her to focus on her life while her equity grows.

    Strategy 2: The Fix-and-Flip (The Sprint)

    Now, let’s look at Mark. Mark has a keen eye for design and isn’t afraid to get his hands dirty—or at least manage a crew that does. He finds a “distressed” property—perhaps a house that has beeeglected for a decade or an estate sale that needs a modern touch. He buys it below market value, spends three months renovating it, and sells it for a significant profit.

    Fix-and-flipping is high-energy and high-reward. It requires a deep understanding of local market trends and renovation costs. If Mark underestimates the cost of a new roof or overestimates the final sale price, his profit margin can evaporate instantly. However, for those who get it right, it’s a way to generate a large amount of capital in a very short period. It’s not just about aesthetics; it’s about “forced appreciation”—creating value where there was none before.

    Strategy 3: The BRRRR Method (The Compounder)

    If Buy-and-Hold is a marathon and Flipping is a sprint, the BRRRR method is the ultimate endurance race that builds a massive portfolio quickly. BRRRR stands for: Buy, Rehab, Rent, Refinance, Repeat.

    Let’s follow Jason’s journey with BRRRR. He buys a fixer-upper with cash or a short-term loan (Buy). He renovates it to increase its value (Rehab). He then finds a reliable tenant to move in (Rent). Once the property is stabilized, he goes to a bank and gets a new long-term mortgage based on the property’s new, higher value (Refinance). He uses that refinanced cash to pay back his initial investment and buy his next property (Repeat).

    The magic of BRRRR is that, if done correctly, Jason can own a portfolio of properties with very little of his own money left in the deals. It’s a powerful way to scale an investment business from one house to twenty in just a few years.

    Strategy 4: Short-Term Rentals (The Hospitality Hustle)

    With the rise of platforms like Airbnb and Vrbo, a new strategy has emerged: Short-Term Rentals (STRs). Instead of renting a house to a family for a year, you rent it to travelers for a few nights at a time. This strategy is particularly effective in vacation hotspots like Orlando, Florida, or the mountains of Teessee.

    The potential for income is much higher with STRs. A house that might rent for $2,000 a month on a long-term lease could potentially generate $5,000 a month during peak tourist season. However, this is more of a hospitality business than a traditional real estate investment. You have to worry about cleaning, guest reviews, and changing local regulations. Many cities in the US are tightening rules on short-term rentals, so due diligence is vital.

    Strategy 5: Real Estate Investment Trusts (REITs) (The Hands-Off Approach)

    What if you want to invest in US real estate but you don’t want to deal with houses, tenants, or banks at all? This is where REITs come in. A REIT is a company that owns, operates, or finances income-producing real estate. They are traded on the stock market just like Apple or Amazon.

    By buying shares in a REIT, you are essentially becoming a fractional owner of a massive portfolio—it could be shopping malls, data centers, warehouses, or apartment complexes across the country. REITs are required by law to pay out at least 90% of their taxable income to shareholders as dividends. It is the ultimate “lazy” investment strategy, providing liquidity and diversification without the need for a large down payment.

    Navigating the 2024 Market Challenges

    The US market today is not the same as it was ten years ago. Interest rates have risen, and inventory is tight. Successful investors are shifting their focus to “secondary markets”—cities like Indianapolis, Kansas City, or Huntsville—where the cost of entry is lower and the “rent-to-price” ratio is more favorable than in expensive hubs like San Francisco or New York.

    Furthermore, technology is changing how we invest. From AI-driven property valuations to platforms that allow you to buy “fractions” of a rental property for as little as $100, the barriers to entry are falling. However, the fundamentals remain the same: Location, Cash Flow, and Patience.

    Conclusion: Choosing Your Path

    There is no “best” strategy in US property investment, only the best strategy for *you*. If you have capital but no time, REITs or managed Buy-and-Hold properties might be your path. If you have time and skills but limited capital, the BRRRR method or wholesaling could be your ticket to the top.

    The US real estate market is like a vast ocean. It can be intimidating, but for those who learn to navigate its currents, it offers incredible rewards. Start small, educate yourself, and remember that every real estate mogul started with their very first property. Whether it’s a small condo or a sprawling apartment complex, the most important step is simply to get started. Your future self, looking back at the portfolio you’ve built, will surely thank you.

  • Sun, Sand, and Savings: Discovering the Best Senior Mobile Home Communities in Palm Beach County

    Sun, Sand, and Savings: Discovering the Best Senior Mobile Home Communities in Palm Beach County

    The Florida Dream Within Reach

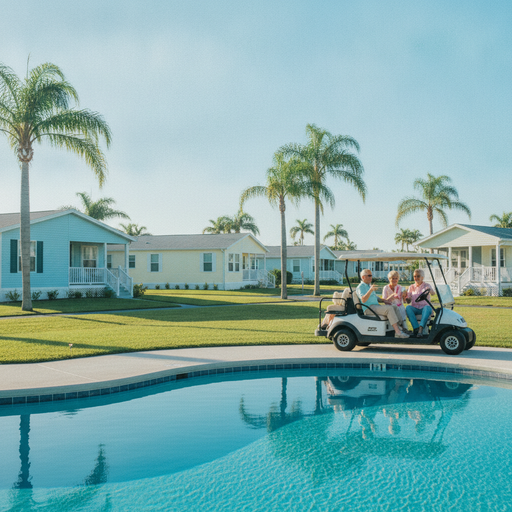
    Imagine waking up to the gentle rustle of palm fronds outside your window. The air is warm, carrying a faint scent of salt from the nearby Atlantic Ocean. You pour a cup of coffee and step out onto your screened-in porch, watching a neighbor zip by on a golf cart with a wave and a smile. For many, this sounds like a luxury lifestyle reserved for the multi-millionaires of Palm Beach Island. But there is a secret that thousands of savvy retirees have already discovered: senior mobile home communities in Palm Beach County offer the same tropical paradise at a fraction of the cost.

    Retirement is supposed to be about freedom—freedom from the cold, freedom from high-maintenance yards, and freedom from financial stress. In Palm Beach County, 55+ mobile home living has evolved far beyond the outdated stereotypes of the past. Today, these communities are vibrant, manicured neighborhoods featuring modern manufactured homes that rival traditional stick-built houses in both aesthetics and comfort. If you are looking to stretch your retirement savings without sacrificing the Florida lifestyle, you are in the right place.

    Why Palm Beach County is the Ultimate Retirement Destination

    Palm Beach County is often considered the crown jewel of Florida’s Atlantic coast. Stretching from the quiet charm of Jupiter in the north to the bustling sophistication of Boca Raton in the south, it offers a diverse landscape of culture, nature, and recreation. For seniors, the perks are endless. You have access to world-class healthcare facilities, premier shopping at places like The Gardens Mall or CityPlace, and more golf courses per capita than almost anywhere else in the world.

    But beyond the amenities, it is the environment that draws people in. The county is home to miles of pristine public beaches, lush nature preserves like the Loxahatchee National Wildlife Refuge, and a climate that allows for outdoor activities 365 days a year. When you choose a senior mobile home in this area, you aren’t just buying a house; you are buying a front-row seat to one of the most beautiful regions in the United States.

    Breaking the Myth: Modern Manufactured Housing

    If you haven’t stepped inside a modern manufactured home lately, you are in for a surprise. Gone are the days of dark, narrow “trailers.” Today’s senior mobile homes in Palm Beach County feature open-concept floor plans, high ceilings, gourmet kitchens with granite countertops, and spacious master suites. Many are built with high-impact windows to withstand Florida’s weather and feature charming “Key West” style architecture with pastel colors and decorative shutters.

    The beauty of these homes lies in their efficiency and customization. Because they are built in controlled environments, the quality control is often superior to traditional homes. For a senior looking to downsize, these homes provide the perfect “Goldilocks” solution—not too big to clean, but large enough to host the grandkids for a week during spring break.

    Resort-Style Amenities That Keep You Active

    One of the biggest draws of 55+ mobile home communities in Palm Beach County is the social infrastructure. These are not just places to sleep; they are lifestyle hubs. Most communities feature a central clubhouse that serves as the heart of the neighborhood. Here, you might find a heated swimming pool, shuffleboard courts, and even the increasingly popular pickleball courts where friendly competitions happen daily.

    Community managers often employ social directors to organize a calendar full of activities. From potluck diers and bingo nights to water aerobics and organized bus trips to the Kravis Center for the Performing Arts, there is never a shortage of things to do. For a senior moving from out of state, this built-in social network is invaluable. It makes it incredibly easy to find your “tribe” and build meaningful friendships in a short amount of time.

    The Financial Advantage of Land-Lease Living

    Understanding the financial model of senior mobile homes is key to realizing why they are such a smart move. Most communities in Palm Beach County operate on a “land-lease” basis. This means you own the home itself, but you pay a monthly “lot rent” to the community for the land it sits on. While some people are initially hesitant about not owning the land, the benefits are significant.

    First, the entry price is much lower. You can often purchase a beautiful, renovated 2-bedroom home for under $150,000—a price point that is virtually non-existent for traditional condos or houses in Palm Beach County. Second, your lot rent typically covers a variety of expenses that would otherwise be separate bills, such as trash pickup, lawn maintenance, and access to all community amenities. This allows for a very predictable monthly budget, which is essential for those living on a fixed income or social security.

    Top Areas to Explore in Palm Beach County

    Palm Beach County is vast, and each pocket has its own personality. If you prefer a quieter, more laid-back vibe, look toward communities in Lake Worth or Lantana. These areas offer a “Old Florida” feel with easy access to the beach and local fishing piers. Many mobile home parks here are tucked away near the Intracoastal Waterway, providing beautiful views and cool breezes.

    For those who want to be closer to the action, West Palm Beach and Boynton Beach have several high-end 55+ communities. These locations put you just minutes away from high-end dining, major airports, and major medical centers. Jupiter, to the north, offers a more upscale, nautical atmosphere, though communities there tend to fill up fast due to the area’s immense popularity. No matter which city you choose, you are never more than a short drive from the sand.

    What to Look for When Buying

    When you begin your search for the perfect senior mobile home, there are a few practical things to keep in mind. First, check the community rules. Every 55+ park has its own set of bylaws regarding pets, parking, and guest stays. Make sure these align with your lifestyle. For example, if you have a beloved Golden Retriever, you’ll want to ensure the park is “pet-friendly” and doesn’t have restrictive weight limits.

    Secondly, consider the age of the home and its hurricane readiness. Look for homes that have been updated with “tie-downs” and storm shutters. Finally, talk to the residents! Walk around the neighborhood during the evening and strike up a conversation. Ask them what they love about the community and how the management handles maintenance. Real-world feedback is the best way to determine if a park is the right fit for your retirement dreams.

    The Social Coection: More Than Just Neighbors

    Perhaps the most underrated benefit of moving into a Palm Beach County senior mobile home community is the sense of security and belonging. In a traditional suburbaeighborhood, you might go years without knowing the person living three doors down. In a 55+ community, neighbors look out for one another. If someone hasn’t been seen at the pool for a few days, friends check in. There is a collective understanding and a shared stage of life that fosters a deep sense of community. For many seniors, this “safety net” provides peace of mind not just for themselves, but for their adult children living elsewhere.

    Conclusion: Your Best Chapter Starts Here

    Retiring to Palm Beach County doesn’t have to remain a “someday” dream. By exploring the world of senior mobile home living, you can unlock a lifestyle filled with sunshine, social coection, and serenity without draining your life savings. Whether you spend your days perfecting your golf swing, beachcombing for shells, or simply enjoying the company of new friends at the clubhouse, you’ll find that life in these communities is as rich as you make it.

    The golden years are meant to be lived, not just managed. In the heart of Florida’s most prestigious county, a welcoming community is waiting for you to call it home. Take the leap, leave the snow shovel behind, and come see why senior mobile homes are the smartest way to enjoy everything the Sunshine State has to offer.

  • From Blueprint to Curb Appeal: A Realistic Guide to Your Custom Home Exterior Timeline and Costs

    From Blueprint to Curb Appeal: A Realistic Guide to Your Custom Home Exterior Timeline and Costs

    The Dream of the Perfect Facade

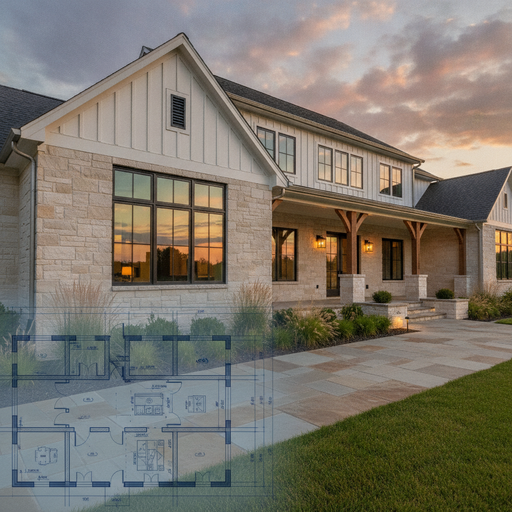
    Imagine standing at the edge of an empty lot, clutching a rolled-up set of blueprints that contain the future of your family’s life. You can almost see it—the way the morning sun will hit the gables, the texture of the stone accents, and the inviting glow of the entryway. But then, reality sets in. How long will it actually take to transform this patch of dirt into a stuing custom exterior? And more importantly, what is it going to do to your bank account?

    Building a custom home exterior is a journey of a thousand decisions. Unlike a cookie-cutter subdivision home, a custom exterior is a reflection of your personality. However, that uniqueness comes with a complex web of timelines and costs. To help you navigate this process without losing your mind, we’re going to break down the stages of construction, the financial investment required, and the storytelling rhythm of bringing a house to life.

    Phase 1: The Invisible Foundation (Plaing and Permits)

    Every great story starts with a solid setup. Before a single hammer swings, there is a period of “invisible work.” For most homeowners, this is the most frustrating part of the timeline because it feels like nothing is happening. In reality, this is where the most critical decisions are made.

    The Timeline: 1 to 3 Months

    Depending on your local municipality, getting permits can take anywhere from a few weeks to several months. During this time, you are finalizing material selections. Are you going with James Hardie siding or natural cedar? Will the roof be architectural shingles or standing seam metal? These choices must be locked in early because supply chain lead times can drastically affect your start date.

    The Cost: $5,000 – $15,000+

    While you aren’t paying for physical labor yet, you are paying for architectural fees, engineering reports, and permit applications. Skipping the professional design phase to save money is a classic mistake that often leads to “change orders” later, which are the primary killers of construction budgets.

    Phase 2: Framing and The Building Envelope

    This is the “growth spurt” phase. One day you have a foundation, and a week later, you have the skeleton of a house. It’s an exciting time where the scale of your vision finally becomes tangible.

    The Timeline: 4 to 8 Weeks

    Once the foundation is cured, framing moves quickly. However, the exterior isn’t just wood. It involves the installation of the “house wrap” or weather barrier. This is the skin of the house that protects it from moisture. After framing, the windows and exterior doors are installed. A “dried-in” house is a major milestone because it means the interior is finally protected from the elements.

    The Cost: $30,000 – $100,000+

    Framing costs vary wildly based on the complexity of your roofline and the square footage. Large, custom windows are another major expense. In the current market, a single high-end custom front door can cost as much as a used car. Expect to allocate a significant portion of your budget here to ensure the structure is sound and energy-efficient.

    Phase 3: The “Face” of the Home (Siding and Masonry)

    This is where the magic happens. This phase is what people actually see when they drive by. It’s the difference between a house that looks “under construction” and one that looks like a home.

    The Timeline: 3 to 6 Weeks

    Installing siding, brick, or stone is meticulous work. If you’ve choseatural stone veneer, the process is much slower than installing vinyl or composite siding. Every stone is hand-cut and placed by a mason. Weather plays a massive role here; a week of heavy rain can easily push your masonry schedule back by ten days.

    The Cost: $15,000 – $75,000

    Materials are the primary driver here.

    • Vinyl Siding: Affordable and fast, but lacks that “custom” feel.
    • Fiber Cement (Hardie Board): The gold standard for durability and aesthetics.
    • Natural Stone/Brick: The most expensive option, but offers incredible ROI and longevity.

    Don’t forget the trim! Fascia, soffits, and decorative corbels add that “finished” look but require detailed labor that adds up quickly.

    Phase 4: Roofing and Finishing Touches

    A roof is more than just protection; it’s the hat that completes the outfit. At the same time, painters and light installers are buzzing around the perimeter.

    The Timeline: 1 to 2 Weeks

    Most roofing jobs only take a few days, but they require a clear weather window. Once the roof is on, the exterior painters arrive to provide the final color palette. Finally, the “jewelry” of the home—the exterior lanterns, house numbers, and mailbox—are installed.

    The Cost: $10,000 – $40,000

    Standard asphalt shingles are the most common choice, costing on the lower end. However, if you opt for slate, tile, or high-end metal roofing, your costs can triple. Exterior lighting and gutters often surprise homeowners with their price tags, so keep a “miscellaneous” fund of at least $5,000 for these finishing touches.

    Why Does the Price Change? (The Hidden Variables)

    You might look at these numbers and wonder why the ranges are so wide. The truth is, building a custom home exterior is like ordering a suit. You can buy one off the rack, or you can have one hand-stitched to your exact measurements. Here are the three things that usually drive the price up:

    1. Architectural Complexity

    A simple rectangular house is easy to clad. A house with multiple gables, turrets, bump-outs, and varying roof pitches requires significantly more material waste and much higher labor costs. Every corner and every joint is a potential point of failure that requires expert craftsmanship.

    2. Geographical Location

    Building in a coastal area requires hurricane-rated windows and salt-resistant finishes, which are significantly more expensive. Building in the mountains may require extra insulation and fire-resistant materials. Furthermore, labor rates in metropolitan areas like New York or San Francisco can be double what they are in rural areas.

    3. Supply Chain and Inflation

    In the post-2020 world, material costs are no longer static. Lumber, steel, and resin-based products fluctuate monthly. A quote you received in January might not be valid in June. Always build a 10-15% “inflation cushion” into your budget to avoid mid-project heartaches.

    The Emotional Timeline: Managing Your Expectations

    Beyond the weeks and the dollars, there is the emotional toll. There will be a week where it looks like nothing happened. There will be a day when the wrong color stone arrives. This is all part of the story. The key to a successful custom exterior build is communication. A good contractor will keep you updated on the “why” behind every delay.

    The total timeline for a custom home exterior typically spans 4 to 8 months from the first permit to the final coat of paint. It is a marathon, not a sprint. But the first time you pull into your driveway and see your vision standing there, solid and beautiful, the months of waiting and every dollar spent will feel worth it.

    Conclusion

    Creating a custom home exterior is a massive undertaking that requires balancing your aesthetic dreams with the hard reality of budgets and schedules. By understanding that the process involves distinct phases—from the quiet plaing stages to the flurry of masonry and finishing—you can approach your project with confidence. Plan for a timeline of roughly six months and a budget that accounts for both your “must-haves” and those inevitable “just-in-case” moments. In the end, you aren’t just building a shell; you’re building the face of your future memories.

  • From Blueprint to Curb Appeal: A Realistic Guide to Your Custom Home Exterior Timeline and Costs

    From Blueprint to Curb Appeal: A Realistic Guide to Your Custom Home Exterior Timeline and Costs

    The Dream of the Perfect Facade

    Imagine standing at the edge of an empty lot, clutching a rolled-up set of blueprints that contain the future of your family’s life. You can almost see it—the way the morning sun will hit the gables, the texture of the stone accents, and the inviting glow of the entryway. But then, reality sets in. How long will it actually take to transform this patch of dirt into a stuing custom exterior? And more importantly, what is it going to do to your bank account?

    Building a custom home exterior is a journey of a thousand decisions. Unlike a cookie-cutter subdivision home, a custom exterior is a reflection of your personality. However, that uniqueness comes with a complex web of timelines and costs. To help you navigate this process without losing your mind, we’re going to break down the stages of construction, the financial investment required, and the storytelling rhythm of bringing a house to life.

    Phase 1: The Invisible Foundation (Plaing and Permits)

    Every great story starts with a solid setup. Before a single hammer swings, there is a period of “invisible work.” For most homeowners, this is the most frustrating part of the timeline because it feels like nothing is happening. In reality, this is where the most critical decisions are made.

    The Timeline: 1 to 3 Months

    Depending on your local municipality, getting permits can take anywhere from a few weeks to several months. During this time, you are finalizing material selections. Are you going with James Hardie siding or natural cedar? Will the roof be architectural shingles or standing seam metal? These choices must be locked in early because supply chain lead times can drastically affect your start date.

    The Cost: $5,000 – $15,000+

    While you aren’t paying for physical labor yet, you are paying for architectural fees, engineering reports, and permit applications. Skipping the professional design phase to save money is a classic mistake that often leads to “change orders” later, which are the primary killers of construction budgets.

    Phase 2: Framing and The Building Envelope

    This is the “growth spurt” phase. One day you have a foundation, and a week later, you have the skeleton of a house. It’s an exciting time where the scale of your vision finally becomes tangible.

    The Timeline: 4 to 8 Weeks

    Once the foundation is cured, framing moves quickly. However, the exterior isn’t just wood. It involves the installation of the “house wrap” or weather barrier. This is the skin of the house that protects it from moisture. After framing, the windows and exterior doors are installed. A “dried-in” house is a major milestone because it means the interior is finally protected from the elements.

    The Cost: $30,000 – $100,000+

    Framing costs vary wildly based on the complexity of your roofline and the square footage. Large, custom windows are another major expense. In the current market, a single high-end custom front door can cost as much as a used car. Expect to allocate a significant portion of your budget here to ensure the structure is sound and energy-efficient.

    Phase 3: The “Face” of the Home (Siding and Masonry)

    This is where the magic happens. This phase is what people actually see when they drive by. It’s the difference between a house that looks “under construction” and one that looks like a home.

    The Timeline: 3 to 6 Weeks

    Installing siding, brick, or stone is meticulous work. If you’ve choseatural stone veneer, the process is much slower than installing vinyl or composite siding. Every stone is hand-cut and placed by a mason. Weather plays a massive role here; a week of heavy rain can easily push your masonry schedule back by ten days.

    The Cost: $15,000 – $75,000

    Materials are the primary driver here.

    • Vinyl Siding: Affordable and fast, but lacks that “custom” feel.
    • Fiber Cement (Hardie Board): The gold standard for durability and aesthetics.
    • Natural Stone/Brick: The most expensive option, but offers incredible ROI and longevity.

    Don’t forget the trim! Fascia, soffits, and decorative corbels add that “finished” look but require detailed labor that adds up quickly.

    Phase 4: Roofing and Finishing Touches

    A roof is more than just protection; it’s the hat that completes the outfit. At the same time, painters and light installers are buzzing around the perimeter.

    The Timeline: 1 to 2 Weeks

    Most roofing jobs only take a few days, but they require a clear weather window. Once the roof is on, the exterior painters arrive to provide the final color palette. Finally, the “jewelry” of the home—the exterior lanterns, house numbers, and mailbox—are installed.

    The Cost: $10,000 – $40,000

    Standard asphalt shingles are the most common choice, costing on the lower end. However, if you opt for slate, tile, or high-end metal roofing, your costs can triple. Exterior lighting and gutters often surprise homeowners with their price tags, so keep a “miscellaneous” fund of at least $5,000 for these finishing touches.

    Why Does the Price Change? (The Hidden Variables)

    You might look at these numbers and wonder why the ranges are so wide. The truth is, building a custom home exterior is like ordering a suit. You can buy one off the rack, or you can have one hand-stitched to your exact measurements. Here are the three things that usually drive the price up:

    1. Architectural Complexity

    A simple rectangular house is easy to clad. A house with multiple gables, turrets, bump-outs, and varying roof pitches requires significantly more material waste and much higher labor costs. Every corner and every joint is a potential point of failure that requires expert craftsmanship.

    2. Geographical Location

    Building in a coastal area requires hurricane-rated windows and salt-resistant finishes, which are significantly more expensive. Building in the mountains may require extra insulation and fire-resistant materials. Furthermore, labor rates in metropolitan areas like New York or San Francisco can be double what they are in rural areas.

    3. Supply Chain and Inflation

    In the post-2020 world, material costs are no longer static. Lumber, steel, and resin-based products fluctuate monthly. A quote you received in January might not be valid in June. Always build a 10-15% “inflation cushion” into your budget to avoid mid-project heartaches.

    The Emotional Timeline: Managing Your Expectations

    Beyond the weeks and the dollars, there is the emotional toll. There will be a week where it looks like nothing happened. There will be a day when the wrong color stone arrives. This is all part of the story. The key to a successful custom exterior build is communication. A good contractor will keep you updated on the “why” behind every delay.

    The total timeline for a custom home exterior typically spans 4 to 8 months from the first permit to the final coat of paint. It is a marathon, not a sprint. But the first time you pull into your driveway and see your vision standing there, solid and beautiful, the months of waiting and every dollar spent will feel worth it.

    Conclusion

    Creating a custom home exterior is a massive undertaking that requires balancing your aesthetic dreams with the hard reality of budgets and schedules. By understanding that the process involves distinct phases—from the quiet plaing stages to the flurry of masonry and finishing—you can approach your project with confidence. Plan for a timeline of roughly six months and a budget that accounts for both your “must-haves” and those inevitable “just-in-case” moments. In the end, you aren’t just building a shell; you’re building the face of your future memories.

  • The Hidden Truth Behind Custom Exterior Painting Costs: What You Need to Know Before You Hire

    The Hidden Truth Behind Custom Exterior Painting Costs: What You Need to Know Before You Hire

    The Morning Realization: Why Your Home’s First Impression Matters

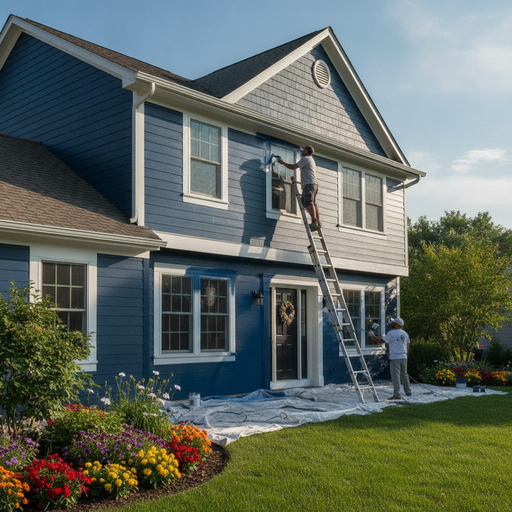
    Imagine pulling into your driveway after a long day at work. The sun is setting, casting a warm glow over your neighborhood. You look at your house—the biggest investment of your life—and instead of feeling a surge of pride, you notice the hairline cracks in the stucco, the peeling paint on the window trim, and a color that looks more like a relic of the 1990s than a modern sanctuary. It happens to the best of us. Over time, the elements take their toll, and your home’s “skin” begins to show its age.

    You decide it’s time for a change. You want a custom look—something that stands out, reflects your personality, and protects your home for the next decade. But then comes the big question that halts every homeowner in their tracks: “How much is this actually going to cost me?” If you’ve started searching for quotes, you’ve likely realized that “custom exterior painting cost” isn’t a simple number you can pull off a shelf. It is a complex calculation of labor, materials, architecture, and preparation. In this guide, we’re going to peel back the layers and explore exactly what goes into the price of a professional, custom exterior paint job.

    Breaking Down the Averages: What Are You Really Paying For?

    In the United States, the average cost to paint a home exterior typically ranges from $3,000 to $10,000. However, for a truly “custom” job—one that involves high-end paints, multiple colors for accents, and meticulous detail work—those numbers can easily climb to $15,000 or more. Why the wide gap? It’s because no two houses are built exactly the same.

    When we talk about custom painting, we aren’t just talking about slapping a single color on four walls. We are talking about a tailored approach that considers the architectural integrity of your home. Are you painting a sprawling one-story ranch or a towering three-story Victorian with intricate gingerbread trim? The complexity of the structure is the primary driver of cost. More height means more equipment, more safety risks, and significantly more time spent on ladders and scaffolding.

    Square Footage vs. Linear Footage

    Most contractors will estimate your cost based on the square footage of your home’s exterior. However, custom work often looks at “linear footage” for the trim, eaves, and fascia. If your design includes a contrasting color for the window frames, shutters, and porch railings, the labor hours increase exponentially. Customization is in the details, and details take time.

    The Secret Sauce: Why Prep Work is 70% of the Bill

    There is a saying in the painting industry: “The finish is only as good as the prep.” If a painter offers you a price that seems too good to be true, they are likely cutting corners on the preparation phase. In a high-quality custom job, the actual painting is the shortest part of the process. The real work happens before a single drop of color touches the wall.

    • Power Washing: Every home needs a deep clean to remove dirt, mildew, and pollutants that prevent paint from bonding.
    • Scraping and Sanding: Old, flaking paint must be removed. This is a labor-intensive process that ensures the new coat won’t peel off in six months.
    • Caulking and Sealing: This is crucial for energy efficiency and moisture protection. A custom pro will seal every gap around windows, doors, and joints.
    • Repairing Damage: Whether it’s wood rot on a siding board or a crack in the stucco, these issues must be fixed first. You don’t want to paint over a problem; you want to solve it.

    When you see a higher quote, you are often paying for the peace of mind that your home is being structurally protected, not just decorated.

    Materials: The Difference Between a 5-Year and a 15-Year Life Cycle

    Not all paints are created equal. When you go the custom route, you are usually opting for premium, architectural-grade paints. While a standard bucket of paint might cost $30, a high-end elastomeric or modified acrylic paint can cost $70 to $100 per gallon. While that sounds expensive, consider the longevity.

    Cheap paint fades under UV rays and becomes brittle in the cold. Premium paints are designed to be flexible—they expand and contract with your home as the temperature changes. They also contain higher concentrations of pigments and resins, which provide better coverage and a richer, more vibrant color. In the world of custom painting, spending an extra $1,000 on materials today can save you $8,000 in repainting costs five years from now.

    Custom Color Consultations

    One of the perks of a custom project is the color consultation. Many high-end painting companies include a professional designer in their package. They help you choose a palette that complements your roof color, your landscaping, and even the natural light of your specific geographic location. This added value ensures you won’t regret your color choice the moment it hits the siding.

    The Impact of Siding Material on Price

    The material of your home’s exterior dictates the type of paint needed and the amount of labor required to apply it. Here is a quick look at how different materials affect the cost:

    • Wood Siding: Wood is beautiful but high maintenance. It requires significant sanding and priming. Because it is porous, it absorbs more paint, meaning you’ll need more gallons to get the job done.
    • Stucco: Stucco has a heavy texture. It requires specialized thick-nap rollers or airless sprayers to ensure the paint gets into every nook and cray. If the stucco is “hot” (new), it requires specific primers to handle the alkalinity.
    • Vinyl Siding: Painting vinyl is cost-effective, but you must use “vinyl-safe” colors. If you paint vinyl too dark, it will absorb too much heat and warp the siding.
    • Brick: Painting brick is a major trend, but it’s a permanent decision. It requires high-quality mineral paints or breathable coatings to ensure moisture isn’t trapped inside the brick, which could lead to structural damage.

    DIY vs. Professional: Is the Savings Worth the Stress?

    It’s tempting to look at a $6,000 quote and think, “I could buy a ladder and do that myself for $1,000.” While the math seems to work on paper, the reality of DIY exterior painting is often a nightmare for the average homeowner. Painting an exterior is physically grueling work that involves heights, chemical handling, and specialized equipment like power washers and sprayers.

    Professional painters bring a crew. What would take you six weekends of back-breaking labor, a pro crew can finish in four days. Furthermore, professionals carry insurance. If a DIYer falls off a ladder, it’s a medical catastrophe. If a pro has an accident, they are covered. Finally, there is the warranty. Most custom painting companies offer a 2 to 5-year warranty on their workmanship—something you won’t get if you do it yourself.

    Conclusion: An Investment in Your Home’s Future

    When you look at the custom exterior painting cost, try not to view it as a simple expense. Instead, look at it as an investment in your home’s equity and protection. A fresh, professional paint job can increase a home’s value by up to 5% and provides a vital barrier against rot, mold, and pests.

    The key to a successful project is transparency. Ask for a detailed, itemized quote. Ensure the contractor specifies the brand of paint they will use and exactly what prep work is included. By understanding the variables—from the height of your gables to the quality of the caulk—you can make an informed decision that ensures your home looks stuing for years to come. Your home is your sanctuary; give it the finish it deserves.

  • The Hidden Truth Behind Custom Exterior Painting Costs: What You Need to Know Before You Hire

    The Hidden Truth Behind Custom Exterior Painting Costs: What You Need to Know Before You Hire

    The Morning Realization: Why Your Home’s First Impression Matters

    Imagine pulling into your driveway after a long day at work. The sun is setting, casting a warm glow over your neighborhood. You look at your house—the biggest investment of your life—and instead of feeling a surge of pride, you notice the hairline cracks in the stucco, the peeling paint on the window trim, and a color that looks more like a relic of the 1990s than a modern sanctuary. It happens to the best of us. Over time, the elements take their toll, and your home’s “skin” begins to show its age.

    You decide it’s time for a change. You want a custom look—something that stands out, reflects your personality, and protects your home for the next decade. But then comes the big question that halts every homeowner in their tracks: “How much is this actually going to cost me?” If you’ve started searching for quotes, you’ve likely realized that “custom exterior painting cost” isn’t a simple number you can pull off a shelf. It is a complex calculation of labor, materials, architecture, and preparation. In this guide, we’re going to peel back the layers and explore exactly what goes into the price of a professional, custom exterior paint job.

    Breaking Down the Averages: What Are You Really Paying For?

    In the United States, the average cost to paint a home exterior typically ranges from $3,000 to $10,000. However, for a truly “custom” job—one that involves high-end paints, multiple colors for accents, and meticulous detail work—those numbers can easily climb to $15,000 or more. Why the wide gap? It’s because no two houses are built exactly the same.

    When we talk about custom painting, we aren’t just talking about slapping a single color on four walls. We are talking about a tailored approach that considers the architectural integrity of your home. Are you painting a sprawling one-story ranch or a towering three-story Victorian with intricate gingerbread trim? The complexity of the structure is the primary driver of cost. More height means more equipment, more safety risks, and significantly more time spent on ladders and scaffolding.

    Square Footage vs. Linear Footage

    Most contractors will estimate your cost based on the square footage of your home’s exterior. However, custom work often looks at “linear footage” for the trim, eaves, and fascia. If your design includes a contrasting color for the window frames, shutters, and porch railings, the labor hours increase exponentially. Customization is in the details, and details take time.

    The Secret Sauce: Why Prep Work is 70% of the Bill

    There is a saying in the painting industry: “The finish is only as good as the prep.” If a painter offers you a price that seems too good to be true, they are likely cutting corners on the preparation phase. In a high-quality custom job, the actual painting is the shortest part of the process. The real work happens before a single drop of color touches the wall.

    • Power Washing: Every home needs a deep clean to remove dirt, mildew, and pollutants that prevent paint from bonding.
    • Scraping and Sanding: Old, flaking paint must be removed. This is a labor-intensive process that ensures the new coat won’t peel off in six months.
    • Caulking and Sealing: This is crucial for energy efficiency and moisture protection. A custom pro will seal every gap around windows, doors, and joints.
    • Repairing Damage: Whether it’s wood rot on a siding board or a crack in the stucco, these issues must be fixed first. You don’t want to paint over a problem; you want to solve it.

    When you see a higher quote, you are often paying for the peace of mind that your home is being structurally protected, not just decorated.

    Materials: The Difference Between a 5-Year and a 15-Year Life Cycle

    Not all paints are created equal. When you go the custom route, you are usually opting for premium, architectural-grade paints. While a standard bucket of paint might cost $30, a high-end elastomeric or modified acrylic paint can cost $70 to $100 per gallon. While that sounds expensive, consider the longevity.

    Cheap paint fades under UV rays and becomes brittle in the cold. Premium paints are designed to be flexible—they expand and contract with your home as the temperature changes. They also contain higher concentrations of pigments and resins, which provide better coverage and a richer, more vibrant color. In the world of custom painting, spending an extra $1,000 on materials today can save you $8,000 in repainting costs five years from now.

    Custom Color Consultations

    One of the perks of a custom project is the color consultation. Many high-end painting companies include a professional designer in their package. They help you choose a palette that complements your roof color, your landscaping, and even the natural light of your specific geographic location. This added value ensures you won’t regret your color choice the moment it hits the siding.

    The Impact of Siding Material on Price

    The material of your home’s exterior dictates the type of paint needed and the amount of labor required to apply it. Here is a quick look at how different materials affect the cost:

    • Wood Siding: Wood is beautiful but high maintenance. It requires significant sanding and priming. Because it is porous, it absorbs more paint, meaning you’ll need more gallons to get the job done.
    • Stucco: Stucco has a heavy texture. It requires specialized thick-nap rollers or airless sprayers to ensure the paint gets into every nook and cray. If the stucco is “hot” (new), it requires specific primers to handle the alkalinity.
    • Vinyl Siding: Painting vinyl is cost-effective, but you must use “vinyl-safe” colors. If you paint vinyl too dark, it will absorb too much heat and warp the siding.
    • Brick: Painting brick is a major trend, but it’s a permanent decision. It requires high-quality mineral paints or breathable coatings to ensure moisture isn’t trapped inside the brick, which could lead to structural damage.

    DIY vs. Professional: Is the Savings Worth the Stress?

    It’s tempting to look at a $6,000 quote and think, “I could buy a ladder and do that myself for $1,000.” While the math seems to work on paper, the reality of DIY exterior painting is often a nightmare for the average homeowner. Painting an exterior is physically grueling work that involves heights, chemical handling, and specialized equipment like power washers and sprayers.

    Professional painters bring a crew. What would take you six weekends of back-breaking labor, a pro crew can finish in four days. Furthermore, professionals carry insurance. If a DIYer falls off a ladder, it’s a medical catastrophe. If a pro has an accident, they are covered. Finally, there is the warranty. Most custom painting companies offer a 2 to 5-year warranty on their workmanship—something you won’t get if you do it yourself.

    Conclusion: An Investment in Your Home’s Future

    When you look at the custom exterior painting cost, try not to view it as a simple expense. Instead, look at it as an investment in your home’s equity and protection. A fresh, professional paint job can increase a home’s value by up to 5% and provides a vital barrier against rot, mold, and pests.

    The key to a successful project is transparency. Ask for a detailed, itemized quote. Ensure the contractor specifies the brand of paint they will use and exactly what prep work is included. By understanding the variables—from the height of your gables to the quality of the caulk—you can make an informed decision that ensures your home looks stuing for years to come. Your home is your sanctuary; give it the finish it deserves.

  • Transforming Your Ranch Home: Creative Backyard Landscaping Ideas for Modern Outdoor Living

    Transforming Your Ranch Home: Creative Backyard Landscaping Ideas for Modern Outdoor Living

    The Hidden Potential of the Classic Ranch Backyard

    There is something inherently nostalgic and comforting about a ranch-style home. With its long, low profile and sprawling footprint, the ranch house—or “rambler” as some call it—represents a golden era of American architecture. If you own one of these gems, you already know the best part: the seamless coection between the indoors and the outdoors. Unlike tall, narrow multi-story builds, a ranch home sits close to the earth, practically begging for a backyard that acts as an extension of the living room.

    I remember visiting a friend who had just purchased a 1960s ranch. At first glance, the backyard was a sea of patchy grass and a single, lonely concrete pad. It felt exposed and uninspired. But as we sat on the back steps, we started to see the “bones” of the property. The wide horizon of the house offered a perfect canvas for layering plants, creating distinct rooms, and building a sanctuary that felt private yet expansive. Whether you are working with a mid-century modern masterpiece or a simple suburban rambler, your backyard has the potential to become your favorite “room” in the house. Here is how we can bring that vision to life.

    Embracing the Horizontal Line: Layering Your Landscape

    The defining characteristic of a ranch home is its horizontal emphasis. To make your landscaping look intentional, you want to mimic and complement those long lines rather than fighting against them. Planting a row of tall, skiy trees right against the house can often make the building look shorter and out of proportion. Instead, think about “layering.”

    Start with low-growing ground covers near the foundation, move into mid-sized shrubs, and place your taller elements further back toward the property line. This creates a sense of depth that makes a small yard feel much larger. Ornamental grasses like Peisetum or Blue Fescue are fantastic for ranch homes because their airy texture softens the hard angles of the architecture without blocking the view from those iconic large windows.

    Creating “Outdoor Rooms” for Every Mood

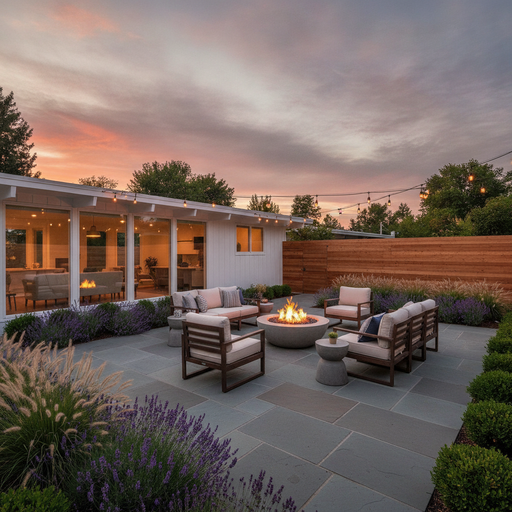
    Because ranch homes often have wide backyards, the space can sometimes feel like a giant, empty field. The secret to a cozy atmosphere is “zoning.” Think of your backyard as a floor plan without walls. You might have a “dining room” featuring a large farmhouse table on a stone patio, a “living room” centered around a fire pit, and perhaps a “quiet nook” tucked away under a pergola for morning coffee.

    • The Dining Zone: Position this closest to the kitchen or the sliding glass doors for easy access. Use oversized pavers with thyme or moss growing between them to create an earthy, lived-in feel.
    • The Fire Pit Hub: Move this further into the yard. A sunken fire pit works beautifully with the low-profile nature of a ranch home, providing a cozy gathering spot that doesn’t obstruct your view of the rest of the landscape.
    • The Recreation Zone: If you have kids or pets, leave a dedicated patch of lush turf in the center, framed by garden beds, to keep the space functional and organized.

    The Power of Hardscaping: Decks, Patios, and Pathways

    The traditional ranch home often came with a small concrete stoop. To truly transform the space, you need to think bigger. A wide, wrap-around wooden deck or a sprawling flagstone patio can bridge the gap between your interior floor level and the ground outside. This “leveling up” is crucial for that indoor-outdoor flow.

    If your ranch sits on a slight slope, consider multi-level terracing. Small stone retaining walls can create flat areas for planting or seating, adding architectural interest to an otherwise flat lot. For materials, stick to natural tones. Warm woods, slate, and pea gravel complement the earthy, grounded aesthetic of most ranch designs. Meandering pathways made of crushed stone or stepping stones can lead the eye—and the feet—through different parts of the garden, making a simple walk to the back fence feel like an exploration.

    Privacy Without the “Closed-In” Feel

    One challenge with ranch homes is that they are often built on large but open lots, leaving you feeling a bit exposed to the neighbors. However, a six-foot wooden privacy fence can sometimes feel like a fortress that clashes with the open vibe of a ranch. Instead, look to “living fences.”

    Strategic plantings of skip laurels, arborvitae, or even tall decorative grasses can provide a soft, green screen that blocks the wind and prying eyes while maintaining a natural look. If you prefer a structural element, consider a horizontal slat fence. The horizontal lines of the wood mimic the siding of the ranch home, creating a modern and cohesive look that feels sophisticated rather than restrictive.

    Plant Selection: Color, Texture, and Ease of Maintenance

    When choosing plants for a ranch backyard, I always recommend a mix of evergreen structure and seasonal color. Since many ranch homes feature large picture windows, you want your garden to look good even in the middle of winter. Evergreens like boxwoods or dwarf conifers provide that year-round “skeleton” for your garden.

    For a pop of personality, consider the following:

    • Hydrangeas: Their large, lush blooms add a touch of classic elegance and fill up space quickly along the foundation.
    • Lavender and Sage: These offer incredible scent and silvery-green foliage that pairs beautifully with the mid-century aesthetic.
    • Japanese Maples: A well-placed Japanese Maple can serve as a stuing focal point, offering delicate leaves and vibrant fall colors without growing so tall that it overshadows the house.
    • Native Wildflowers: If you want a lower-maintenance “meadow” look, dedicated patches of native blooms will attract pollinators and provide a changing tapestry of color throughout the year.

    Lighting: The Finishing Touch

    Don’t let your beautiful new landscape disappear when the sun goes down. Lighting is the “jewelry” of the backyard. Because ranch homes are long, you can use exterior lighting to highlight the texture of your home’s siding or stone accents. Path lights along your walkways ensure safety, while uplighting a few key trees creates a dramatic, high-end look. String lights (bistro lights) crisscrossing over a patio instantly add a festive, welcoming glow that invites you to stay outside just a little bit longer.

    Conclusion: Your Personal Oasis Awaits

    Landscaping a ranch home is all about balance. It is about respecting the original architecture while breathing new life into the earth around it. By focusing on horizontal lines, creating functional zones, and choosing a palette of plants that offer texture and color, you can transform a simple backyard into a sophisticated retreat.

    Remember, you don’t have to do it all at once. Start with a solid patio and a few foundation plants, then add a new “zone” or a winding path each season. Before you know it, you won’t just have a backyard; you’ll have a sanctuary that perfectly reflects the relaxed, grounded spirit of ranch living. So, grab a shovel, a cold drink, and start dreaming—your perfect ranch retreat is just a few plants away.

  • Transforming Your Ranch Home: Creative Backyard Landscaping Ideas for Modern Outdoor Living

    Transforming Your Ranch Home: Creative Backyard Landscaping Ideas for Modern Outdoor Living

    The Hidden Potential of the Classic Ranch Backyard

    There is something inherently nostalgic and comforting about a ranch-style home. With its long, low profile and sprawling footprint, the ranch house—or “rambler” as some call it—represents a golden era of American architecture. If you own one of these gems, you already know the best part: the seamless coection between the indoors and the outdoors. Unlike tall, narrow multi-story builds, a ranch home sits close to the earth, practically begging for a backyard that acts as an extension of the living room.

    I remember visiting a friend who had just purchased a 1960s ranch. At first glance, the backyard was a sea of patchy grass and a single, lonely concrete pad. It felt exposed and uninspired. But as we sat on the back steps, we started to see the “bones” of the property. The wide horizon of the house offered a perfect canvas for layering plants, creating distinct rooms, and building a sanctuary that felt private yet expansive. Whether you are working with a mid-century modern masterpiece or a simple suburban rambler, your backyard has the potential to become your favorite “room” in the house. Here is how we can bring that vision to life.

    Embracing the Horizontal Line: Layering Your Landscape

    The defining characteristic of a ranch home is its horizontal emphasis. To make your landscaping look intentional, you want to mimic and complement those long lines rather than fighting against them. Planting a row of tall, skiy trees right against the house can often make the building look shorter and out of proportion. Instead, think about “layering.”

    Start with low-growing ground covers near the foundation, move into mid-sized shrubs, and place your taller elements further back toward the property line. This creates a sense of depth that makes a small yard feel much larger. Ornamental grasses like Peisetum or Blue Fescue are fantastic for ranch homes because their airy texture softens the hard angles of the architecture without blocking the view from those iconic large windows.

    Creating “Outdoor Rooms” for Every Mood

    Because ranch homes often have wide backyards, the space can sometimes feel like a giant, empty field. The secret to a cozy atmosphere is “zoning.” Think of your backyard as a floor plan without walls. You might have a “dining room” featuring a large farmhouse table on a stone patio, a “living room” centered around a fire pit, and perhaps a “quiet nook” tucked away under a pergola for morning coffee.

    • The Dining Zone: Position this closest to the kitchen or the sliding glass doors for easy access. Use oversized pavers with thyme or moss growing between them to create an earthy, lived-in feel.
    • The Fire Pit Hub: Move this further into the yard. A sunken fire pit works beautifully with the low-profile nature of a ranch home, providing a cozy gathering spot that doesn’t obstruct your view of the rest of the landscape.
    • The Recreation Zone: If you have kids or pets, leave a dedicated patch of lush turf in the center, framed by garden beds, to keep the space functional and organized.

    The Power of Hardscaping: Decks, Patios, and Pathways

    The traditional ranch home often came with a small concrete stoop. To truly transform the space, you need to think bigger. A wide, wrap-around wooden deck or a sprawling flagstone patio can bridge the gap between your interior floor level and the ground outside. This “leveling up” is crucial for that indoor-outdoor flow.

    If your ranch sits on a slight slope, consider multi-level terracing. Small stone retaining walls can create flat areas for planting or seating, adding architectural interest to an otherwise flat lot. For materials, stick to natural tones. Warm woods, slate, and pea gravel complement the earthy, grounded aesthetic of most ranch designs. Meandering pathways made of crushed stone or stepping stones can lead the eye—and the feet—through different parts of the garden, making a simple walk to the back fence feel like an exploration.

    Privacy Without the “Closed-In” Feel

    One challenge with ranch homes is that they are often built on large but open lots, leaving you feeling a bit exposed to the neighbors. However, a six-foot wooden privacy fence can sometimes feel like a fortress that clashes with the open vibe of a ranch. Instead, look to “living fences.”

    Strategic plantings of skip laurels, arborvitae, or even tall decorative grasses can provide a soft, green screen that blocks the wind and prying eyes while maintaining a natural look. If you prefer a structural element, consider a horizontal slat fence. The horizontal lines of the wood mimic the siding of the ranch home, creating a modern and cohesive look that feels sophisticated rather than restrictive.

    Plant Selection: Color, Texture, and Ease of Maintenance

    When choosing plants for a ranch backyard, I always recommend a mix of evergreen structure and seasonal color. Since many ranch homes feature large picture windows, you want your garden to look good even in the middle of winter. Evergreens like boxwoods or dwarf conifers provide that year-round “skeleton” for your garden.

    For a pop of personality, consider the following:

    • Hydrangeas: Their large, lush blooms add a touch of classic elegance and fill up space quickly along the foundation.
    • Lavender and Sage: These offer incredible scent and silvery-green foliage that pairs beautifully with the mid-century aesthetic.
    • Japanese Maples: A well-placed Japanese Maple can serve as a stuing focal point, offering delicate leaves and vibrant fall colors without growing so tall that it overshadows the house.
    • Native Wildflowers: If you want a lower-maintenance “meadow” look, dedicated patches of native blooms will attract pollinators and provide a changing tapestry of color throughout the year.

    Lighting: The Finishing Touch

    Don’t let your beautiful new landscape disappear when the sun goes down. Lighting is the “jewelry” of the backyard. Because ranch homes are long, you can use exterior lighting to highlight the texture of your home’s siding or stone accents. Path lights along your walkways ensure safety, while uplighting a few key trees creates a dramatic, high-end look. String lights (bistro lights) crisscrossing over a patio instantly add a festive, welcoming glow that invites you to stay outside just a little bit longer.

    Conclusion: Your Personal Oasis Awaits

    Landscaping a ranch home is all about balance. It is about respecting the original architecture while breathing new life into the earth around it. By focusing on horizontal lines, creating functional zones, and choosing a palette of plants that offer texture and color, you can transform a simple backyard into a sophisticated retreat.

    Remember, you don’t have to do it all at once. Start with a solid patio and a few foundation plants, then add a new “zone” or a winding path each season. Before you know it, you won’t just have a backyard; you’ll have a sanctuary that perfectly reflects the relaxed, grounded spirit of ranch living. So, grab a shovel, a cold drink, and start dreaming—your perfect ranch retreat is just a few plants away.